Sharing InTime Results
The data generated in InTime can be shared with other users across different projects. You can share data manually through the use of a file or via the InTime Server. This guide shows how to manage InTime data across multiple users and multiple servers.
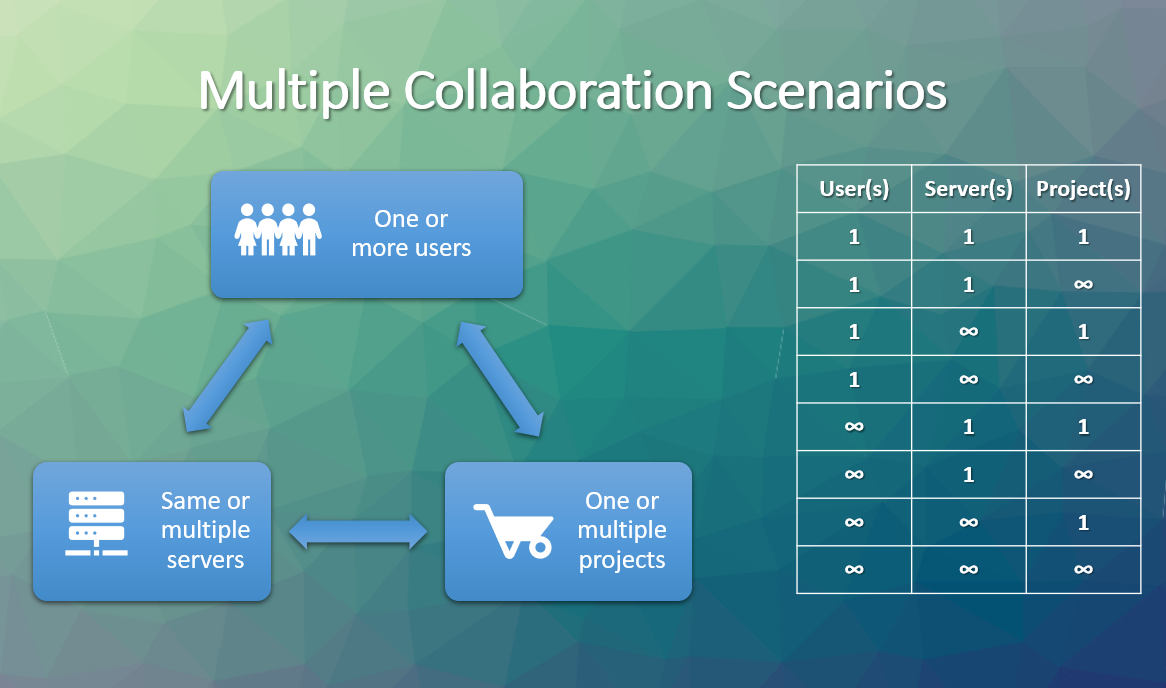
Collaboration Scenarios
InTime supports a diverse range of users and IT infrastructures. A single user can access multiple servers and work on multiple projects in parallel. In another scenario, multiple users may be working on the same project in a distributed networked environment.
How Data is Organized
By Project Path (Design ID)
Every project new to InTime is assigned a unique Design ID. All results that are generated in InTime will be associated with this Design ID. This is supported in all versions of InTime.
By Design Tag
Starting from InTime v3.1.4, a customizable text identifier can be tagged to each project. Projects that are tagged with the same identifier will be considered part of the same "design" when InTime learns from the results.
Where Data is Stored
1. intimeruns.db
Every InTime client stores its data locally in a file called "intimeruns.db". The data may be a subset of the entire database in the InTime Server Database. There are 2 different modes.
| Mode | File Location |
|---|---|
| User (default) | <user home>/.plunify/<user_mac address>/intimeruns.db |
| Project | <project folder>/plunify.jobs/intimeruns.db |
User mode
The path can be changed to point to any folder using the custom_session_path option, e.g.
/intime.sh -custom_session_path /mnt/mypath/
Project mode (default)
This is the default mode. The database file will be stored in the
To enable this mode, close your project, run the Tcl command misc set_runs_db project. Re-open the project
2. InTime Server Database
If InTime is running in a networked environment with multiple users and machines, the data can be saved (manually or automatically) in the centralized InTime Server Database (ISD).
Important
What you See Is What You Get
Regardless of where data is stored, what you see in the history is what InTime uses for training and learning. If you don't see it in the history, that data is not part of the opened design. 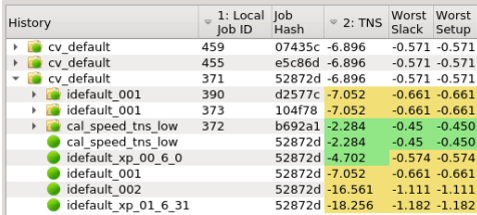
Share By Design Tag
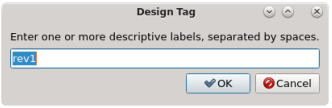
What is Design Tag
Tagging a design with a unique string allows you to control how and when its data is going to be used or shared.

Using the tag as an identifier, InTime syncs the relevant data quickly among different users, over multiple machines via the centralized InTime Server Database.
Each design can only have 1 tag. Changing the tag means overwriting the previous one. The tag is tied to the design, not to individual results.
How to tag your design or change a tag
In the GUI, under “Current Project”, select “Design Tag” option in the menu.
For Tcl command, type
project design_tag rev1 where rev1 is the new tag.
To change the tag, follow the same steps as above.
Upload to InTime Server Database
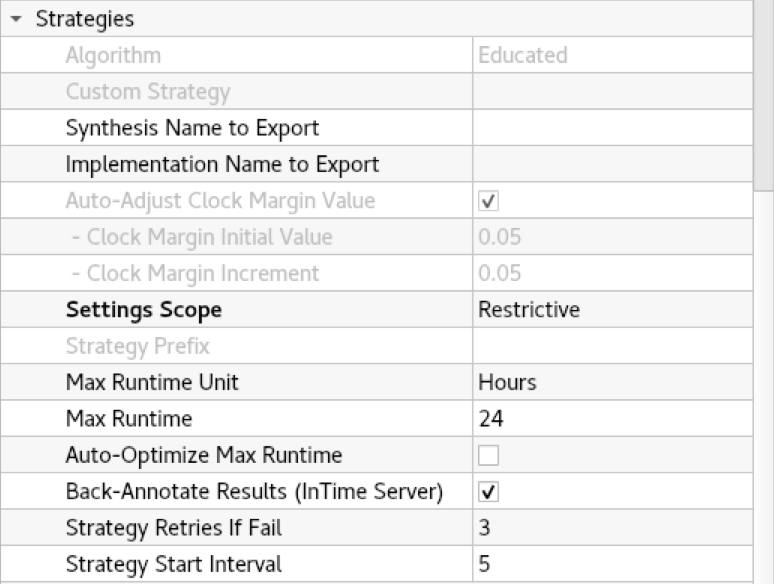
To automatically save a backup of your results to the InTime Server Database, check “Back-Annotate Results (InTime Server)”.
Via InTime GUI: see Export Data to InTime Server
Via Tcl: run this command
results export –server_db
Note
If the Design Tag has been changed locally, the design tag on InTime Server database will also be updated in the next sync.
Import from InTime Server Database
GUI
Go to “File” > “Import with Design Tag”.
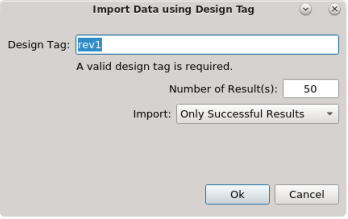
There are 3 fields:
-
Design Tag
-
Number of results to import - The maximum is 500.
-
“Only Successful Results” or “All Results”, which includes failed and not started.
Tcl Commands
Example 1: Import 50 results with the design tag rev1.
plunify> results import -server_db -all –n 50 –designtag rev1
Example 2: Import 20 successful results with the design tag rev2.
plunify> results import -server_db -success –n 20 –designtag rev2
Automatically Sync Data for New Projects
When you open a new project (without results) in InTime, InTime prompts you for a Design Tag. If you provide a Design Tag, InTime will pull data with a matching Design Tag from the InTime Server Database.
To turn off this feature, enter at the Tcl console:
misc set auto_import false
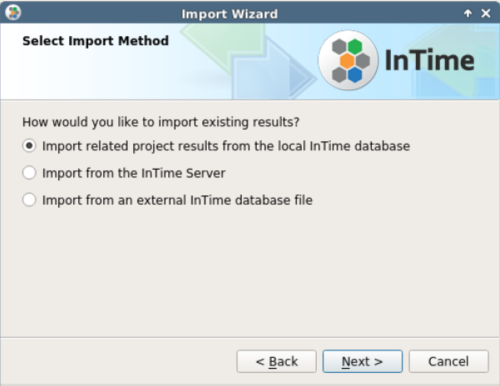
Share by Project Path (Design ID)
There are 3 channels to import or export results.
-
Local database file
The data is already in the current intimeruns database file but is saved under a different project or design ID. Different projects are assigned a "design ID", which differentiates them. (Only for import) -
InTime Server
The data can be imported from the centralized InTime Server Database or exported to it. -
External database file
The data is in a file which is exported from other InTime clients or can be imported from into InTime clients.
Export
Export Data To Local File
To export data, select the File > Export Results menu option. This will start the Export Results Wizard.
To do this in Tcl, first select the jobs that needs to be exported, using the results add command.
Example, to export the results of the last job to a file, select the results of the last job, then export it.
plunify> results add last_job
plunify> results export /tmp/backup.export -local_db
Example, to export the results of job 333 to a file, select the results of the last job, then export it.
plunify> results add job 333
plunify> results export /tmp/backup.export -local_db
/tmp/backup.export.
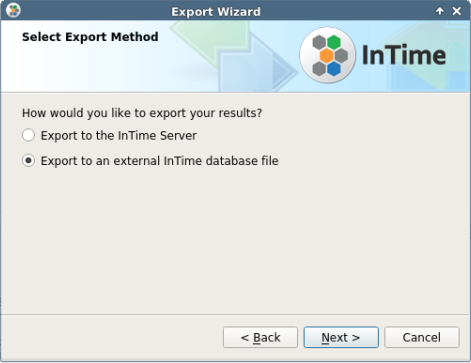
Export Data To InTime Server Database
To back up the data on the InTime Server Database, in the GUI, just select the option "Export to the InTime Server".
For Tcl, use the -server_db option. There is no need to specify a filename.
plunify> results export -server_db
Import
Import Data From Local Database File
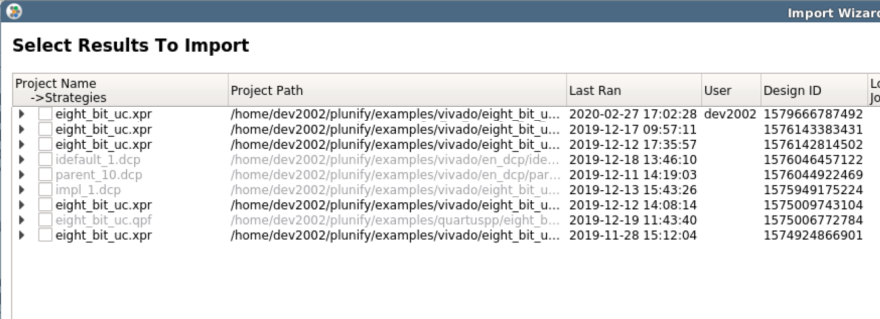
Select the File > Import Results menu option. This will start the Import Results Wizard below.
You can choose to import data into the current project or into another project.
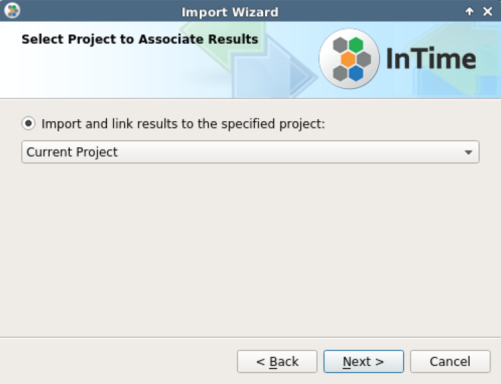
The list of available results will be displayed. Use the checkboxes to select the project whose data you want to import into your current database. Click 'Next' to continue.
Importing via Tcl commands for this option is not supported.
Import From InTime Server Database
The steps are the same as "Import Data From Local Database File", except that the data source is from the InTime Server Database. Importing via Tcl commands for this option is not supported.
Import From External Database File
Similar to the previous 2 options, except that the filename of the data source is required.
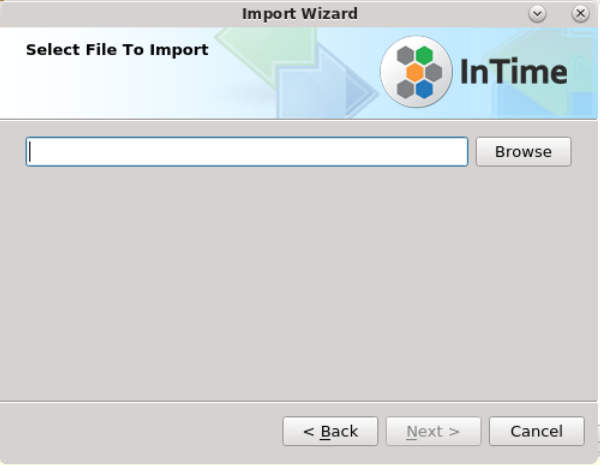
In Tcl console, to import from an external file, using the -local_db option
plunify> results import -local_db /tmp/backup.export
/tmp/backup.export is the filename of the data source.