Compute Grid Automatic Configuration
Note
Users running InTime on a single server machine or via Cluster Mode can skip this section.
This guide assumes that InTime Server and License are installed successfully.
Quick Start Options
Pre-requisite: Ensure the FPGA tool executable is in the environment PATH variable.
Example 1
Launch InTime Client with InTime Server and License located at the IP address 1.1.1.1, using a port number of 33940, and opening a Vivado project.
$ ./intme.sh -ip 1.1.1.1 -comport 33940 -tc vivado
Below is an explanation of the arguments used in the command.
| Arguments | Description |
|---|---|
| ip | This is the InTime Server/License IP address |
| comport | This is the network port required to connect to the server. |
| tc | FPGA vendor tool type. Options include vivado, quartusii, quartuspp, libero and ise. It will detect the version from the PATH variable. |
Example 2
Specify the InTime Server as part of the LM_LICENSE_FILE environment variable, e.g. 39940@1.1.1.1 where 1.1.1.1 is the InTime Server IP. The InTime Client will automatically picks up the required information.
$ export LM_LICENSE_FILE=39940@1.1.1.1
$ ./intime.sh -tc vivado
Quick Setup - LSF/PBS/SGE/SLURM
After launching InTime, run this command in the Tcl console. For example, for LSF,
misc set grid lsf
For more information about customizing the grid commands and configuration, please refer to LSF/PBS/SGE/SLURM configuration. Other grids such as SGE and PBS are also supported.
The quick start is meant to enable user to start running quickly, with some pre-requisites. In the event that the quick start does not work, the environments need to be setup manually.
Configuration Tools
To setup the environment manually, there are a few options to configure the InTime Server and build environment.
- Admin Web Portal (Browser)
- Private Cloud Console (InTime GUI)
- Admin Console (Terminal)
Admin Web Portal
The InTime Server Admin Web Portal allows users to configure InTime Server settings from a web browser, making configuration faster and easier.
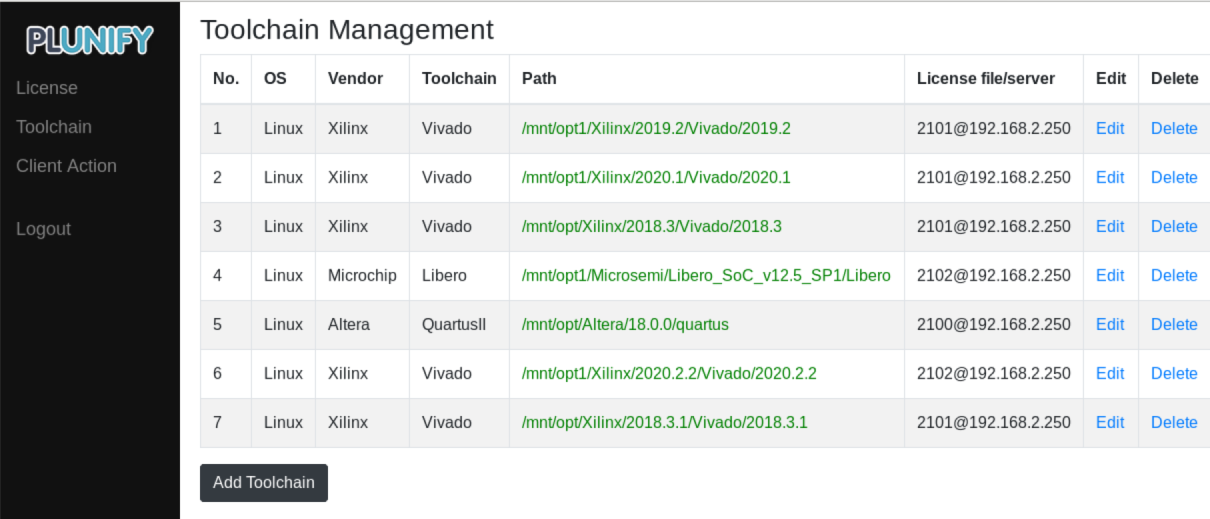
Please refer to Admin Web Portal page for more information.
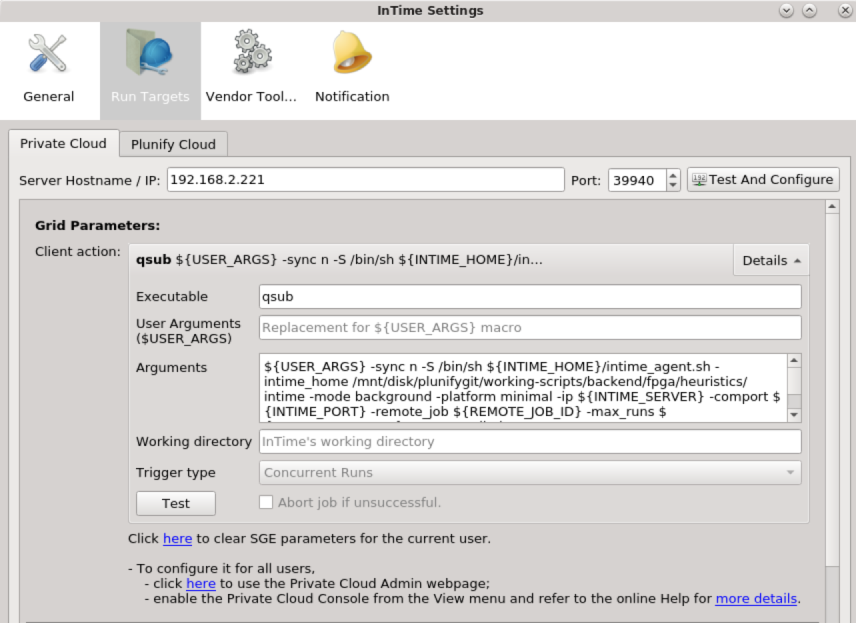
Private Cloud Console
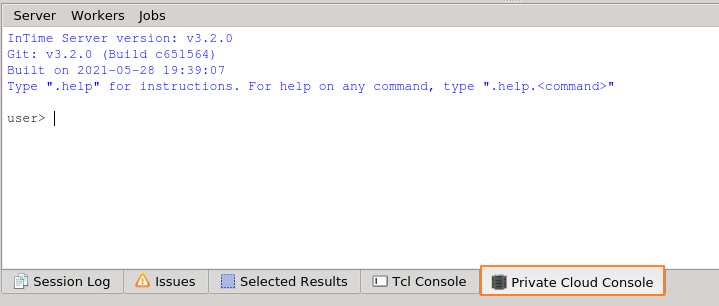 Type the commands in the console to execute them. You do not require access to InTime Server to execute them.
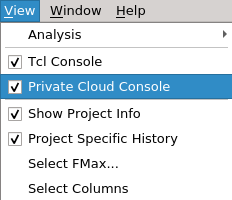
If the console is not visible, it must be enabled from within the InTime GUI by enabling it as shown below
Admin Console
If you have access to the InTime Server, there is an administration console provided for configuration tasks. The InTime Server only allows localhost for admin access by default. The user has to start InTime Server with an additional argument to make admin mode available to all users. See section on Remote Administration
To launch the Admin Console:
$ pwd
/home/intime/intimeserver

$ ./admin_console.sh
InTime Server version: 1.1.0
Git: v1.2.0 (Build cd64f0b)
Type ".help" for instructions. For help on any command, type ".help.<command>"

user>
After launching the console, enter Admin mode using the .admin
command:
user>.admin
admin>
To leave Admin mode and return to User mode, type .user. To exit the Admin Console when in User mode, type .exit.
For more information on the commands, refer to the Private Cloud / InTime Server Administration page.