Configure InTime Client
Pre-requisites
- InTime is installed on the current machine or a shared network drive.
- One or more FPGA software installations are used to build the design.
Step 1: License Registration
A video tutorial showing how to register your local license is also available here.
Using InTime GUI
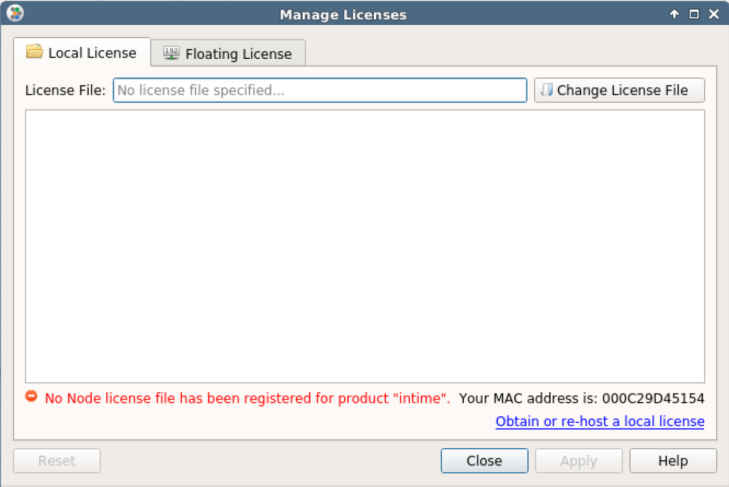
After starting InTime GUI, if you are registering a license for the first time, the manage license widget will indicate that no license is currently registered. The Manage License widget can be used to view the state of the registered license at any time.
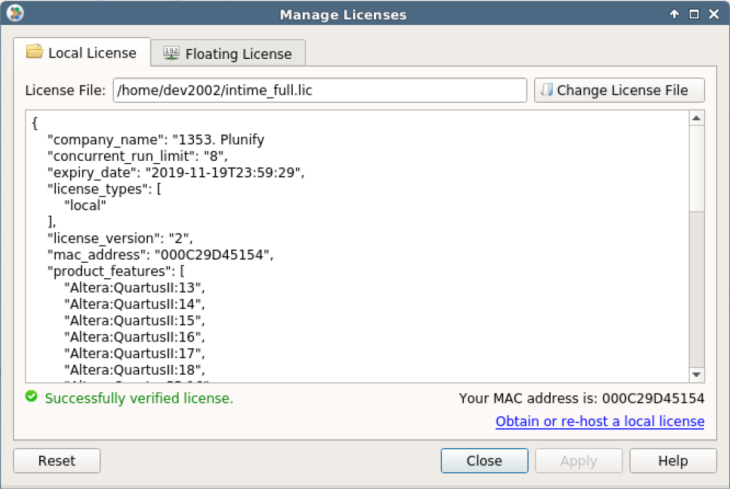
Node License
For a node-locked license, click on the "Change License File" button and browse to your license file. If the selected license file is valid, it will be loaded and its contents shown and InTime will indicate that the license was successfully verified as shown.
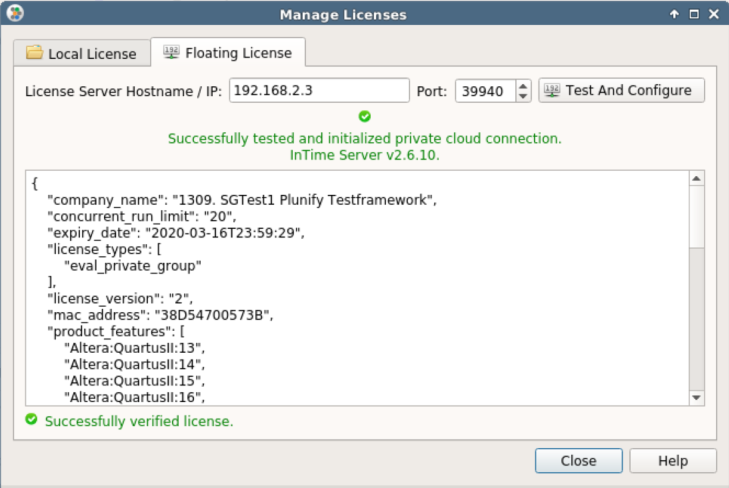
Floating License
For a floating license, click on the "Floating License" tab, and specify the InTime server or the floating license server's IP address.
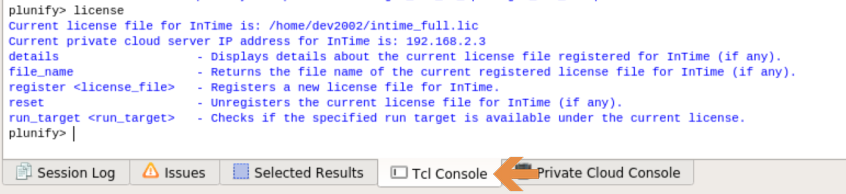
Using InTime Tcl Console or Command Line
The InTime GUI comes with a Tcl console at the bottom of the GUI.
Node License
The license Tcl command provides a set of sub-commands which can be used to manage the registered license. To check the current license,
To register a new license file at "/home/user/license.lic", use the following command:
plunify> license register /home/user/license.lic
You can also save the command to a Tcl file, e.g. license.tcl and execute it from the command line.
intime_sh -mode batch --platform minimal -s license.tcl
Floating License
When starting InTime from the command line, use the -ip argument to specify the ip address of the License or InTime Server. Use the -comport argument for the port used for the license check.
intime_sh -ip 192.168.1.1 -comport 39940 -mode batch -s intimeflow.tcl
Step 2: Register FPGA Software
InTime runs on top of FPGA vendor software tools. When opening a project, InTime detects the required FPGA vendor toolchain and initializes it. Therefore, the FPGA vendor tool must be registered before opening any project.
Tip
You can skip toolchain configuration if the environmental variables has already been set up. Simply start InTime with the -tc <toolchain name>. Example: intime.sh -tc vivado. It will pick up the right toolchain automatically. See this kb - Auto-detect FPGA toolchain and license information
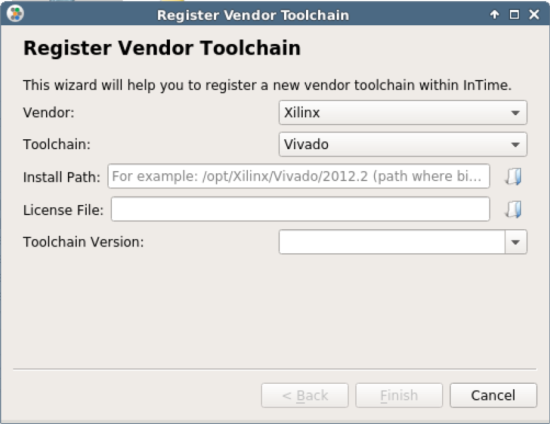
For each tool the following information is required:
- Vendor Name: The name of the tool vendor.
- Toolchain Name: The name of the tool.
- Install Path: The path where this version of the tool is installed.
- License File: The path where the license or license server associated with this tool can be found. If not specified, InTime
uses the
LM_LICENSE_FILEvariable in the environment in which InTime was launched.
With InTime GUI
To register and manage toolchains (your installed FPGA software), open the "File" > "Settings" menu and then select "Vendor Toolchains"

New tools can be added either using the auto-detection mechanism (only available on Windows OS) or the Register Vendor Toolchain wizard by clicking on the "Add Tool" button.
This wizard gives hints on which path in the tool installation directory needs to be selected and detect the tool version automatically. If the wrong directory in the tool installation tree is selected, an error message will appear.
With InTime Tcl Console
Vendor toolchain management in the Tcl environment is done using the vendors command.
# Command to auto-detect toolchains (only available on Windows):
plunify> vendors auto_detect
To register new tools, use the following command:
# Command to manually register new toolchains:
plunify> vendors register <vendor_name> <toolchain> <install_path> <license_file>
To show all registered toolchains
Type vendors list. It will give a quick overview of currently registered toolchains.
Using the Command line
To configure InTime via the command line, please download sample configuration scripts from the Plunify github.
- Edit the intime_install_FPGA_tools.tcl to specify the installation path to the FPGA toolchains and their respective licenses. Multiple toolchains can be configured at the same time.
    set yourtoolchainpath(0) "/mnt/Xilinx/Vivado/2018.2"
    set yourtoolchainlicense(0) "/mnt/license_file.lic"
    #
    # If you have multiple toolchains, use an array to specify them
    #
    # set yourtoolchainpath(1) "/mnt/Xilinx/Vivado/2017.4"
    # set yourtoolchainlicense(1) "/mnt/license_file.lic"
    # set yourtoolchainpath(2) ""
    # set yourtoolchainlicense(2) ""
- Open the command-line interface, and run the command
./intime.sh -mode batch -platform minimal -s intime_install_FPGA_tools.tcl
This should configure InTime to recognize where are the FPGA tools and licenses.