Quick Start for InTime
1. Start InTime
![]() After installation, run InTime by double-clicking the InTime desktop shortcut (shown on the left), which should appear on your desktop after a successful installation.
After installation, run InTime by double-clicking the InTime desktop shortcut (shown on the left), which should appear on your desktop after a successful installation.
Alternatively, open a commandline terminal and enter the following command:
| OS | Path |
|---|---|
| Linux | <InTime installation directory>/intime.sh |
| Windows | <InTime installation directory>/intime.exe |
There are additional arguments if you are running in Tcl mode or batch mode. Refer to InTime arguments for more information.
2. Install the InTime license and configure FPGA vendor tool settings
Refer to Single Server configuration page to install the license and configure the FPGA vendor's tools.
You can skip FPGA vendor tool configuration if the required FPGA tool has already been set up in your environment. Simply start InTime with the -tc <toolchain name> and it will pick up the right FPGA vendor tool automatically. Refer to the Quick Setup page.
Example: to automatically register the Vivado tool,
$ ./intime.sh -tc vivado
3. Open An Example Project
Once the FPGA vendor tools have been registered, go to File -> Open Example Project. A list of possible projects based on your InTime license and FPGA vendor tools will be displayed.
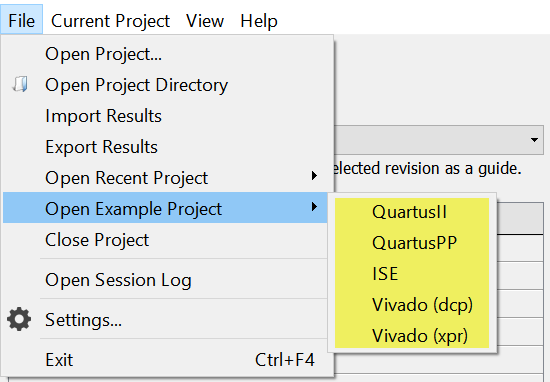
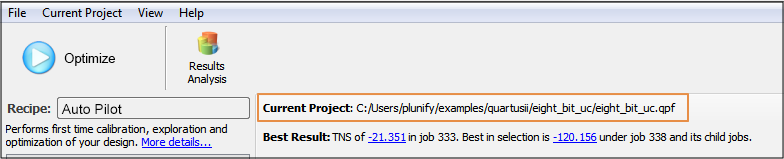
Select the right project and click to open your FPGA project. If successful, the project name will be displayed, similar to the one shown below
The next step is to select an InTime recipe. A recipe represents a compilation and learning flow.
4. Run the default Auto Pilot Recipe
The easiest way to get started is to run the "Auto Pilot" recipe.
What is the "Auto Pilot" recipe?
This recipe reads existing reports in your FPGA project to determine the type of design challenge, for instance, a placement, routing or timing failure. Then Auto Pilot will recommend appropriate flows to run in order to achieve the performance target.
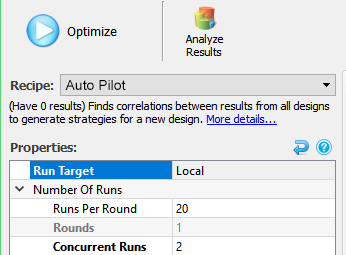
Configure Flow Properties
Set your compute resources by configuring the following properties.
- Run Target: Local (Runs all compilations on the same machine.)
- Concurrent Runs: 4 (Set this to a number based on how many compilations your machine can run in parallel.)
if you are running on multiple machines (Private Cloud), update the flow properties to match the following:
Run Target      : Private Cloud
Concurrent Runs : 4 (Set this to the number of compilation machines you are using.)
Once that is done, jump to the "Start Optimization" section.
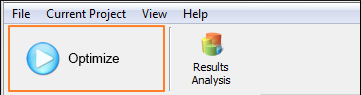
5. Start Optimization
Click the "Optimize"" button as shown below
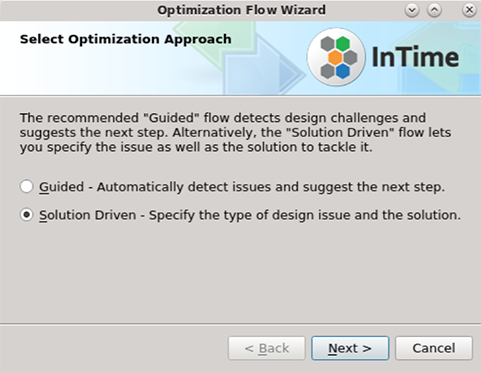
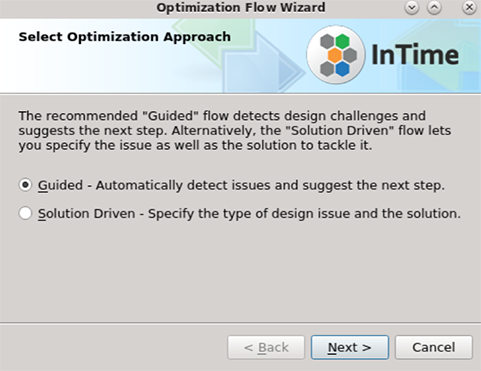
A simple wizard appears with two choices: "Guided" or "Solution Driven". Select "Solution Driven" if you already know the type of challenge that your design is facing:
Supported challenges
Supported design challenges are different depending on the target device and FPGA tool.
- Solution Driven: Specify the type of challenge your design is facing, and run the corresponding flow.
- "Synth" (Synthesis): Errors in synthesis.
- "Place" (Placement): Challenges in local, global placement, congestion and multi-die interconnect limitations.
- "Route" (Routing): Congestion is causing node overlaps or inability to route every signal.
- Timing: Design does not meet all its timing constraints.
- Custom: Advanced option for users who create their own Auto Pilot Templates.
- Guided: Let InTime detect your existing results and recommend next steps.
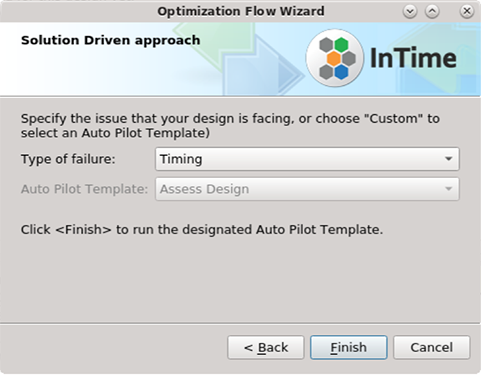
Solution Driven Approach
Here is an example of the Solution Driven approach:
-
Click Next to continue to the next screen.
-
Indicate the type of challenge that you are facing, and click Finish. InTime will run a flow that addresses the selected design challenge.
Guided Approach
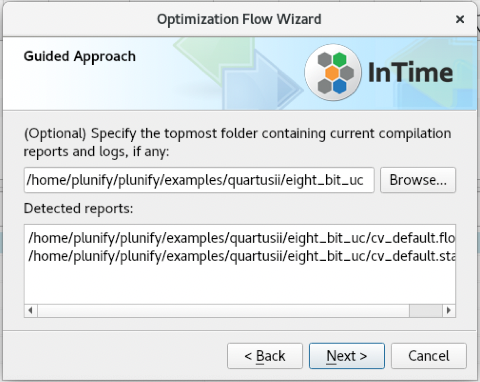
Here is an example of the Guided approach:
-
InTime detects the existing compilation results in your project. If the reports and logfiles are in a non-standard directory, specify the location and InTime will try to detect them.
-
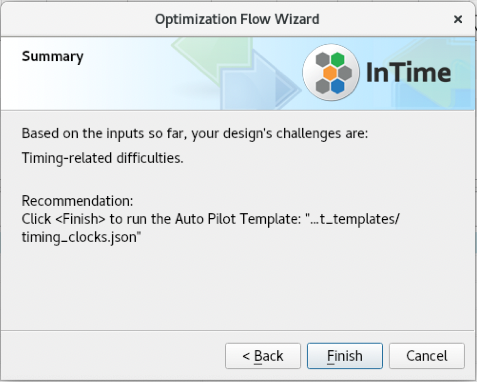
After reading the existing results, InTime displays the detected design challenge and suggests a corresponding flow.
- Click Finish to run the suggestion, or
- Cancel and go back to specify the design challenge in the Solution Driven approach.
Confirmation
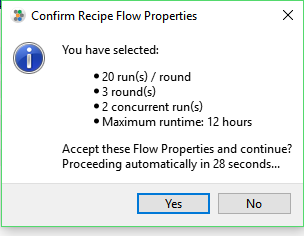
Next, a prompt appears to ask you to confirm the Flow Properties. This is just a reminder to double-check properties like "Concurrent Runs" or "Maximum RunTime".
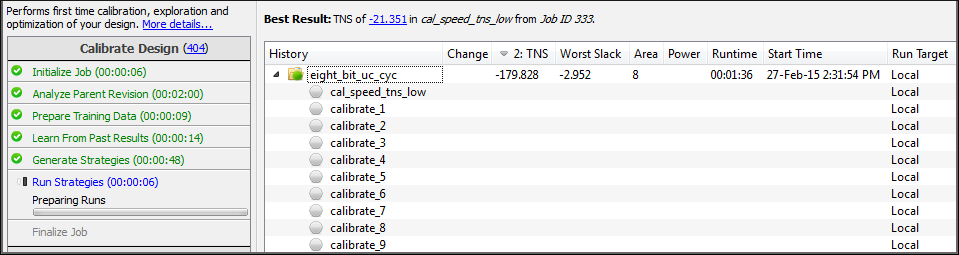
When InTime starts to run, the generated strategies and their statuses will automatically refresh in the history.
6. Analyze Results
After a successful compilation, a green circle will appear beside each strategy, along with the timing and area results.

A green highlight means that the result improved and yellow means that it got worse. You can sort the results by clicking the respective column header(s). For more information about what the icons mean, refer to this page about project history icons.
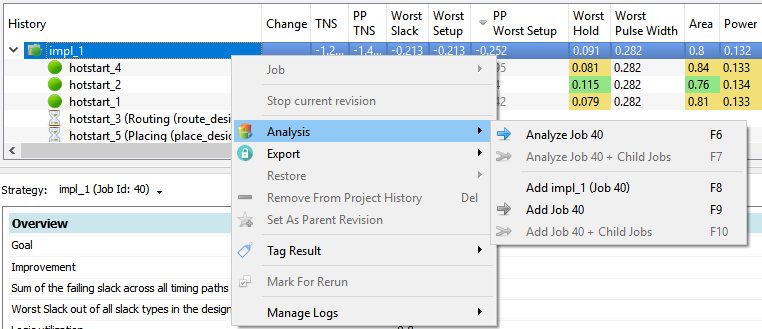
Right-click and select "Analyze Job XX + Child Jobs" to see the rate of improvement and results across jobs.
Refer to the Analyze Results page for an explanation of all the features.
7. Export Selected Result
When you have obtained a good result, you can export it to your FPGA software to verify the result. The TNS and WNS values must correspond to those reported by InTime. Please refer to "Export InTime Results" page for more details.